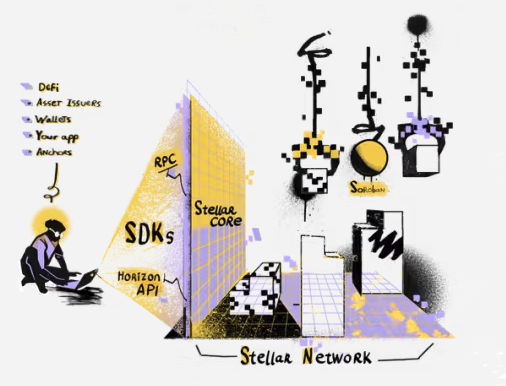
Hello! My name is Luiz, and in this article, I'll guide you through the basics of creating a smart contract on the Stellar blockchain using the Soroban SDK and Rust.
We'll build a simple Greeting Contract that interacts with users by storing and returning customized greeting messages. So, without further ado, let's get started!
Installing Stellar CLI and Setting Up the Development Environment
The best way to install stellar-cli on your computer is via cargo and Rust. Follow these steps to set up your environment:
- Install Rust by following the official documentation:
- Rust Installation Guide
- After installing Rust, add the
wasm32-unknown-unknowntarget:rustup target add wasm32-unknown-unknown
- Install Stellar CLI by running:
cargo install --locked stellar-cli --features opt - Verify the installation:
stellar --help - Initialize a new smart contract project:
stellar contract init greeting.soroban - Bonus Tip: Create a
rustfmt.tomlfile in the project root to define custom formatting:hard_tabs = true tab_spaces = 2 - Bonus Tip: Set up a
Makefileto manage builds, tests, and formatting across multiple contracts:CONTRACT_DIRS := $(wildcard contracts/*) default: build all: test build: @set -e; \ for dir in $(CONTRACT_DIRS); do \ echo "Building contract in $$dir..."; \ $(MAKE) -C $$dir build || exit 1; \ done @ls -l target/wasm32-unknown-unknown/release/*.wasm test: @set -e; \ for dir in $(CONTRACT_DIRS); do \ echo "Building contract in $$dir..."; \ $(MAKE) -C $$dir test || exit 1; \ done
Coding the Greeting Contract
Our contract will have two functions:
say_hello: Returns a greeting message based on stored user data.- If user data exists, it returns the stored custom message.
- Otherwise, it returns the default message: "Hello, Developer!"
customize_greeting: Allows users to set their custom greeting message.
1. Creating storage.rs
This file will manage the contract's storage, ensuring consistency and ease of access.
#![allow(unused)]
use soroban_sdk::{contracttype, symbol_short, Address, Env, IntoVal, String};

#[contracttype]
pub enum UserInfoRegistry {
    UserInfo(Address),
}

#[contracttype]
#[derive(Clone)]
pub struct UserInfo {
    pub address: Address,
    pub message: String,
}

pub struct StorageClient;

impl StorageClient {
    pub fn get_default_user_info(env: Env, user: Address) -> UserInfo {
        let message: String = "Hello, Developer!".into_val(&env);
        UserInfo { address: user.clone(), message }
    }
}
2. Exposing the Storage Module
In the main contract file, include mod storage; to access the StorageClient module.
#![no_std]
use soroban_sdk::{contract, contractimpl, vec, Env, String, Vec};

#[contract]
pub struct Contract;

#[contractimpl]
impl Contract {
    pub fn hello(env: Env, to: String) -> Vec<String> {
        vec![&env, String::from_str(&env, "Hello"), to]
    }
}

mod storage;
mod test;
3. Implementing say_hello
#[contractimpl]
  impl Contract {
    // ...
    pub fn say_hello(env: Env, to: Address) -> storage::UserInfo {
      let key = storage::UserInfoRegistry::UserInfo(to.clone()); // gets the key on the storage

      let user_record = env
        .storage()
        .instance()
        .get(&key)
        .unwrap_or(storage::StorageClient::get_default_user_info(env, to)); // gets the user record from the storage

      return user_record; // returns the user record
    }
    // ...
  }
4. Implementing customize_greeting
#[contractimpl]
impl Contract {
  // ...
  pub fn customize_greeting(env: Env, to: Address, message: String) -> storage::UserInfo {
    let key = storage::UserInfoRegistry::UserInfo(to.clone()); // gets the key on the storage

    let mut user_record =
      env
        .storage()
        .instance()
        .get(&key)
        .unwrap_or(storage::StorageClient::get_default_user_info(
          env.clone(),
          to,
        )); // gets the user record from the storage

    user_record.message = message; // modify the message

    env.storage().instance().set(&key, &user_record); // save message on storage

    return user_record; // returns the user record
  }
  // ...
}
5. Final Implementation
#![no_std]
use soroban_sdk::{contract, contractimpl, Address, Env, String};

#[contract]
pub struct Contract;

#[contractimpl]
impl Contract {
    pub fn say_hello(env: Env, to: Address) -> storage::UserInfo {
        let key = storage::UserInfoRegistry::UserInfo(to.clone()); // gets the key on the storage

        let user_record = env
            .storage()
            .instance()
            .get(&key)
            .unwrap_or(storage::StorageClient::get_default_user_info(env, to)); // gets the user record from the storage

        return user_record; // returns the user record
    }

    pub fn customize_greeting(env: Env, to: Address, message: String) -> storage::UserInfo {
        let key = storage::UserInfoRegistry::UserInfo(to.clone()); // gets the key on the storage

        let mut user_record =
            env
                .storage()
                .instance()
                .get(&key)
                .unwrap_or(storage::StorageClient::get_default_user_info(
                    env.clone(),
                    to,
                )); // gets the user record from the storage

        user_record.message = message;

        env.storage().instance().set(&key, &user_record);

        return user_record; // returns the user record
    }
}

mod storage;
mod test;
Writing Tests
In this section, we’ll explore how to write and run unit tests for Soroban smart contracts using Rust. Unit testing plays a crucial role in smart contract development by allowing developers to verify the correctness of individual contract functions in an isolated environment
1. Testing say_hello
#[test]
fn test_say_hello() {
    let env = Env::default();

    let contract_id = env.register(Contract, ()); // registers the contract
    let client = ContractClient::new(&env, &contract_id); // deploys/instantiates the contract

    let alice = Address::generate(&env); // generates a random address

    let greeting = client.say_hello(&alice); // calls the say_hello function

    let message = String::from_str(&env, "Hello Developer!"); // creates the default expected message

    // asserts that the values match
    assert_eq!(greeting.address, alice);
    assert_eq!(greeting.message, message);
}
2. Testing customize_greeting
#[test]
fn test_customize_greeting() {
    let env: Env = Env::default();

  let contract_id = env.register(Contract, ()); // registers the contract
  let client = ContractClient::new(&env, &contract_id); // deploys/instantiates the contract

  let alice = Address::generate(&env); // generates a random address

  let message = String::from_str(&env, "Hello Alice!"); // creates the customized expected message

  let greeting = client.customize_greeting(&alice, &message); // calls the customize_greeting function to change the message on storage

  let greeting_say_hello = client.say_hello(&alice); // calls the say_hello function to ensure that the message was changed

    // asserts that the values match
  assert_eq!(greeting.address, alice);
  assert_eq!(greeting.message, message);
  assert_eq!(greeting_say_hello.address, alice);
  assert_eq!(greeting_say_hello.message, message);
}
Run tests with:
make test
Deploying and Interacting with the Contract
Now that we have our smart contract ready and tested by unit tests, let's deploy it to the Stellar Testnet network using stellar-cli. This will allow us to interact with our contract in a real blockchain environment, simulating how it would work in production. We'll go through the process of setting up a testnet network connection, creating a test account, deploying our contract, and interacting with it step by step.
1. Adding Network to Stellar CLI
stellar network add --global testnet \
  --rpc-url https://soroban-testnet.stellar.org:443 \
  --network-passphrase "Test SDF Network ; September 2015"
2. Creating a Test Account
stellar keys generate --global alice --network testnet
3. Deploying the Contract
stellar contract deploy \
  --wasm target/wasm32-unknown-unknown/release/greeting_contract.wasm \
  --source alice \
  --network testnet

ℹ️ Simulating install transaction…
ℹ️ Signing transaction: feecf902b1eba34529ed340c9bf28cacd179c3c0e628ccdbb50414d1b5265a51
🌎 Submitting install transaction…
ℹ️ Using wasm hash 9be6a4a2a6c1c4794ce50d38ce69929d0f8d5eb58a9a4451b861c07d8f1dda25
ℹ️ Simulating deploy transaction…
ℹ️ Transaction hash is 38a2ee724c0e1c3ab7c90bdb732d777c21e3e8bd5332bc2aae422deabadbf756
🔗 https://stellar.expert/explorer/testnet/tx/38a2ee724c0e1c3ab7c90bdb732d777c21e3e8bd5332bc2aae422deabadbf756
ℹ️ Signing transaction: 38a2ee724c0e1c3ab7c90bdb732d777c21e3e8bd5332bc2aae422deabadbf756
🌎 Submitting deploy transaction…
🔗 https://stellar.expert/explorer/testnet/contract/CCSYEHWP6B2UZ7AIJKMV2EP5CFAPAEUE2EDJQN4AN5IUNKP5GHT5RW2X
✅ Deployed!
CCSYEHWP6B2UZ7AIJKMV2EP5CFAPAEUE2EDJQN4AN5IUNKP5GHT5RW2X
4. Invoking the Contract
stellar contract invoke \
  --id CCSYEHWP6B2UZ7AIJKMV2EP5CFAPAEUE2EDJQN4AN5IUNKP5GHT5RW2X \
  --source alice \
  --network testnet \
  -- say_hello \
  --to GBGOKKUZ4OMRT26PDCSBCVON2FZCGBNDHGXSMQT2AHAKR22GRR74U2B4

ℹ️ Simulation identified as read-only. Send by rerunning with `--send=yes`.
{"address":"GBGOKKUZ4OMRT26PDCSBCVON2FZCGBNDHGXSMQT2AHAKR22GRR74U2B4","message":"Hello Developer!"}
Conclusion
Congratulations! You've successfully written, tested, deployed, and invoked your first Soroban smart contract on the Stellar Blockchain using Rust. Now, you can explore more advanced contract functionalities and integrate them into real-world applications.
Happy coding! 🚀